How To Capture and Band a Mourning Dove

First you must bait the fields, which have been disked properly by an approved U.S. Fish and Wildlife employee. The area where the bait is placed must first be raked smooth, so the doves can see the bait and have a nice landing area to wander around in and leave footprints. You should probably not joke about leaving dirt angels (like a snow angel, but in dirt) when asked by your boss if you did raked and baited correctly. (What kind of question is that though, really?) Also you should probably not leave messages written in the dirt for said boss, though said boss never did see it.

Baiting the dove field.

After you put out the bait (sunflower seed is what we used) place a metal trap over the bait pile. There is an art to putting out bait. It must be perfectly arranged under the trap or the mourning doves won’t come. They’ll just hang out around the outsides of the traps and not go inside and get caught.

Whitney with the seed bucket.

After an hour or so, go back and check the traps. If there are doves in them, cover the trap with a sheet to calm them down so they don’t hurt themselves against the wire before you get them out.

Whitney removing a dove from the trap while Brady busies himself with the bands.

If you’re really lucky you’ll catch more than one or two doves at a time. However, in my experience, you only catch multiple doves when a big storm is blowing in and the last place you want to be is crouched over a metal trap in the middle of a wide-open field as the lightning gets closer and closer. Then you’ll catch 20 at a time. Other days, maybe 5.

Lauren removing a dove from the trap. Brady stands in the back being exceptionally useful.

After removing the mourning dove from the trap, determine age, sex, and molt status. If any of the feathers on the body and wings have buffy tips, it is a young (hatch year) bird. If it is a hatch year, then the sex is unknown. If it is an adult, males have a slate colored patch on the crown and rosy-tinted feathers on their breast. Females are plain and boring looking. Molt is determined by looking at the wing feathers and seeing which one is growing in, and therefore is shorter and a slightly different color than the older feathers.

Whitney figuring out molt status.

Once you have all that information figured out, a numbered band from the USGS is placed around the right leg of the dove. We were given 100 dove-sized bands, so once 100 are caught we’re done. The banding is done to help gather information about the doves during the dove hunt.

Brady preparing the bands.

Once the band is on, and the the information is written down, release the dove and start over!

Lauren with a dove.
You can’t really tell, but this is an adult male mourning dove. Most of the adults we catch are males.  Nancy thinks this is because males are dumber than females. Might make an interesting study…

The Last RCW Banding

Friday was the last RCW banding of the 2012 season. It’s been a busy few months, and while it is nice to not be as busy (especially in this heat!) I am sad that there are no more trees to climb and ugly baby woodpeckers to play with. My time here at Carolina Sandhills is almost up, and it’s been fantastic. I am exceptionally glad I took this internship and was able to spend 12 weeks here working with RCW’s. Birds are always fun, and climbing trees is awesome, but I think the best part of this internship has been all the people I’ve been privileged to work with. While I’m not always excited about getting up early or having to tromp through the chigger/horse fly/ poison oak infested forest to look for cavity trees, every day is still fun because of the people here. I’m not sure where the future will take me after I leave this place, but I’ll never forget the experiences and people. Especially Brady Vaassen, fellow intern and one of my housemates, who is sitting here on the couch next to me asking when I’ll write a blog post about him and trying to get me to move so he can have the entire couch. Just because you’re 6ft 5in and a bit doesn’t mean you always get to hog the couch.

Pictures were taken by the fabulous Whitney Wallet, intern extraordinaire and friend of the first class.
20ft up a longleaf pine at a RCW cavity. And yes, I do have a turkey feather stuck in my hair.
Trying to get the nestling out of the cavity with my noose.
Nestling secured in the bag slung around my back, and heading down to the ground to get it banded.
Getting ready to band (or standing around looking important).  That’s Evan Brashier on the right (not an intern, he actually gets paid), he banded the chick since I got to climb up and noose it.
Chick in hand, I make my stand, ready to band, best in the land.
The passing of the RCW chick.
Evan banding the chick. It was about 9 or10 days old.
Climbing back up to put the newly-banded nestling back home.
I don’t normally get this excited about putting nestlings back, but there were some interesting comments coming from the peanut gallery on the ground (aka Whitney and Evan).

How to Band a Red-Cockaded Woodpecker

First, peep the cavity to make sure the young woodpeckers are in fact still in there, and have not had some horrible fate befall them, like being eaten by a snake. They will probably think that what you are about to do to them will be pretty horrible, but they’ll get over it.

You’re about to snatch them from their home, the only place they have ever seen in their entire lives, jostle them around, pull them out into the bright light and put some colored bits of plastic and aluminum on their tiny legs. You will then put them back into their cavity without eating them, but they don’t know that yet.

Peeping the cavity with the peeper, a camera on a telescoping pole. 


Next, you assemble your equipment: a climbing harness, short lengths of rope (to go around the tree), ladders, and your banding vest with a nestling pouch, gloves (to keep your hands from becoming encrusted with sap during the climb up), and corn starch (to de-stickify your hands so the baby RCW’s don’t adhere to your fingers). A hat or bandanna to keep the sap out of your hair is also a good idea.
Set the ladder against the tree, put your rope around the tree and attach it to your harness, and begin climbing. If the cavity is taller than 10 feet (the height of one ladder) you will have to use multiple ladders. This can be done by climbing to the top of the first ladder, and then having your ground crew (or your boss, who is watching you from the ground to make sure you don’t mess up) pass you up the second, which attaches to the top of the first. Each ladder has a chain that is wrapped around the tree and secured, so there is no danger of the ladders getting tired and deciding to head down to the ground without you.
Climbing up the tree.


The rope is attached to your harness and is wrapped around the tree. As you climb the ladder, move the rope up the tree with you.
At the cavity, getting ready to take out the nestlings.


Climb to the cavity and remove the nestlings (easier said than done. Let’s just say it’s like blind fishing). Put them in the nestling pouch around your neck. Be sure to sling it over your shoulder for the climb down so you don’t accidentally bump the nestlings against the ladder.
8 day old red-cockaded woodpecker nestling. 

Once safely on the ground, let the banding commence! On the left leg, each bird gets an aluminum band with a unique number and a colored plastic band. On the right leg, each bird gets a unique color combination of plastic bands (such as striped, dark green, orange– not a combination I’ve used so far, but I’m sure it’ll be used someday). This allows for identification of the individual without having to catch the bird and read the tiny number off the aluminum band. It’s much easier for both observer and observee if the biologist can use a spotting scope to read the color combinations from a distance.

Making sure to put the correct combination of bands on the chick is important, because those bands are not exactly easy to remove if they’re on in the wrong order.
Putting on the colored bands.
Banding. 
Climb back up the tree and plop the nestlings back into the cavity. Then climb back down, un-chaining the ladder as you do. Then gather up everything, put it in the truck, and head off to the next tree to climb.
Left leg with dark green colored band and aluminum band. 
Putting the babies safely back into their cavity. 
Oh yes, and don’t forget to have someone take lots of pictures of you during the whole process. That’s the whole point of this process, to have pictures of you doing something cool. Studying an endangered species is just a minor detail. 

How to Peep a Red-Cockaded Woodpecker

Currently, I am an intern at the Carolina Sandhills National Wildlife Refuge, located near McBee, South Carolina. I spend my days working with the biologists to study red-cockaded woodpeckers, an endangered species. These are pretty awesome birds, and it is very exciting to spend every day running around in the pines looking at a bird species that many people have never seen.

A bad picture of an adult Red-cockaded Woodpecker.

Here are step-by-step instructions for how to peep a Red-Cockaded Woodpecker (RCW for short):

1). Assemble your equipment. This includes a peeper (see picture) and battery, a massive 4-wheel drive government truck, a map, a compass, a notebook and a pencil. Water and food are also advisable, because you will be out all day. Also a radio or cell phone so when you get lost you can call someone.

  • Note: everything will become covered with sap from the pine trees. Everything. It does come off, eventually.
A peeper. It is leaning on a RCW cavity tree, marked with white paint and a numbered metal tag. There is another RCW tree in the background.
This thing is a beast. I have yet to come up with an appropriate name. I have also yet to get stuck, though not for lack of trying. Apparently I am not very good at choosing places to turn around. 4-wheel drive rocks. Hard.

2). Using your map, locate and drive to your first cluster of RCW cavities.

  • Note: the scale on the map is not what one would call accurate. Nor are the trees placed on the map in their exact locations in relation to the road or the other trees in the cluster. Sometimes the trees will not be on the map at all. All of the cavity trees are marked with a stripe of white paint at about chest height, but this does not necessarily make them easy to find, especially when the turkey oak has grown up to exactly the height of the stripes. In this instance you will make an educated guess as to what direction to go in and head that way. You will probably be wandering around in the woods searching for trees for at least 20-odd minutes. You may not find some of the trees until you have given up and decided to head back to the truck. Also: It is helpful to remember where you left the truck, so you can find your way back at some point. The compass comes in handy for this.
This is compartment 9. There are 21 total compartments, with usually around 12 clusters (the red circles) of RCW cavities in each compartment.
  • You will not find all of the trees, even when you are standing exactly where the tree should be according to the map. As previously mentioned, the map is occasionally wrong about tree placement, or omits trees altogether. Frustration levels directly correlate with the humidity/temperature and blood sugar levels. Foul words will emit from your mouth.
I hate cluster 7. Hate. With a passion.
I was searching for tree 109, which it turns out is not in front of tree 64, as shown on the map, but instead a good quarter-mile behind it, right next to tree 98, which was also not on the map. I penciled them in after I eventually found them on Friday. When you stand in front of tree 64, where tree 109 should be, you can see all the other trees, but not 109 (because it’s actually a quarter-mile behind you, hidden in the pine plantation). The first time I went looking for tree 109 it was late in the afternoon, I was hungry, and I was this close to kicking a tree or throwing myself on the ground and having a minor temper-tantrum. But that would hurt, and I’m not a fan of poison ivy, so instead I went back to the truck, turned on the A/C, and blasted the radio. Carry On Wayward Son by Kansas does wonders.
  • Also note: foul words will frequently emit from your vocal chords, so perhaps it’s a good thing that you’re sent out alone to find the RCW trees.

3). Once you have arrived at the first tree to peep:

  • First bang on the bottom of the tree with a stick, so that if a RCW is in the cavity it will vacate so you can stick in the camera. As the agitated RCW parent flies out of the cavity, assure them you will be quick and not hurt their babies/eggs. Continue talking to RCW’s in area for duration of time at tree. Again, it’s perhaps a good thing you were sent out alone in the woods.
  • Next, extend the telescoping pole with the camera up to the cavity and stick the camera in the hole.
  • Note: if the hole is 20 feet or lower, it will be relatively easy and you will feel overconfident of your abilities to peep. If the cavity is 20 feet or higher, it will be much harder to get the camera into the cavity. It will also be windy, especially if the cavity you are trying to peep is 30+ feet. The sun will also be shining directly into your eyes as you look up at the tree to direct the small, fist-sized camera into the woodpecker cavity. If you are really lucky, it will be both windy and sunny, and the cavity will be slightly higher than 35 feet, which is the total length of your telescoping pole, so you’ll have to lift the whole thing to get it up that few extra inches.
  • Also, the higher and more difficult the cavity to reach with the peeper (i.e., branches in the way you have to maneuver around) the greater likelihood the battery in the camera will die by the time you get it into the cavity. The battery will only run out of juice once you’ve extended the peeper, not while on the ground when it would be easy to change. Some of the batteries will last a day and a half, others will not. They all look the same, and there is no way to tell how long the battery will last. However, it will always run out at an inopportune moment.
  • Also note: the peeper is a $3,000 piece of equipment, which costs more than all of the possessions you brought with you, including your car, laptop, and rock climbing/camping equipment. So while you are stumbling around in the woods looking for RCW trees, don’t hit it on anything, or drop it, or let it get wet when it rains, and when you’re driving around on the bumpy “roads” on the refuge, make sure it doesn’t jostle around in the truck. The $1.87/hr you make ($75/week, 40hrs/week) for this internship will not go very far towards a new one. So be careful.

4). The wireless camera on the end of the pole will transmit an image to the LCD screen at the peeper base, where you are. You will probably have to jiggle the antenna around in order to get a clear image of what is in the cavity.

5). Write down what you see in the cavity (chips, eggs, nestlings, flying squirrels, RCW’s, nothing) in your notebook.

Adult RCW on eggs, refusing to budge out of the cavity so I can see how many. Not cool dude, not cool.
Three RCW fledglings. Baby woodpeckers are not cute, they are featherless little blobs with giant heads and they flail about helplessly, trying to hide under each other when you stick the camera in.

Below is a video I took of some flying squirrels all piled up in a RCW cavity. I’ve only ever been able to see three at a time, but I’m sure they pack themselves in pretty good. I guess the ones on the top are the low guys on the totem pole, because they’re the ones that would get picked off first if someone tries to reach in there for a flying squirrel snack during the day.

Four RCW eggs in a cavity.

6). Pull the camera down, and get your hands covered in sap. Somehow throughout the day you will get sap on your hands, shirt, pants, shoes, notebook, pencil, water bottle, steering wheel, and sunglasses. Periodically worry about it getting into your hair and having to cut it out/shave your head. Then decide that this might be the way to go, as it’d probably be pretty cool (temperature-wise, not in any other -wise) in the summer.

7). Drop your pencil in the poison ivy/oak growing everywhere around base of tree (this step is optional, and highly probable).

8). Gather up all your things, variously forgetting the battery, maps, beating stick, and pencil at different trees.

  • Note: the peeper is not exactly heavy, but throughout the day starts to weigh more and more. When you have extensive hikes, it is recommended to switch shoulders, unless you prefer to cultivate a permanent bruise on just one shoulder. Your shoulder will most likely be tender for the next 10 weeks of the internship.

9). Once in the truck, buckle in the peeper for the ride to the next cluster.

10). Forget you probably have poison ivy all over your hands and rub your face/eat lunch without washing hands.

11). Repeat until 4 p.m., when you’re done for the day.

This is pretty much how I spend my days. Even when I’m lost, hot, sweaty, covered in sap and being bitten by flies, I still can’t get over how lucky I am to get to do things like this. Being a field biologist (or intern) is the best job ever!

What is a Public Use Intern?

I suppose some of you may be wondering what it is exactly that I’m doing here in Florida. Well, here are a few pictures:

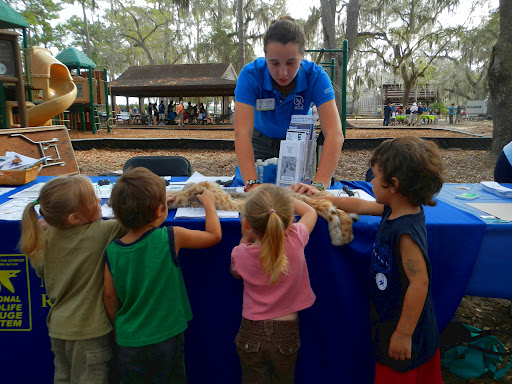
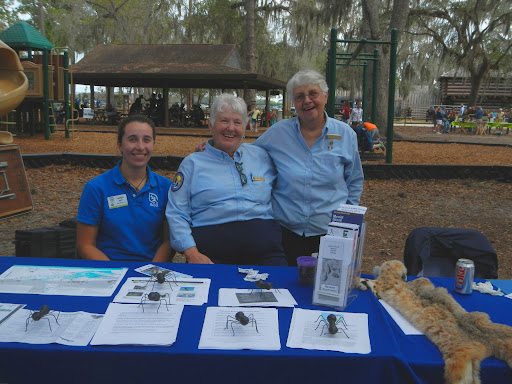
Sometimes I get to help out at festivals, which are quite fun. We set up a booth and people come by and we tell them about the refuge and some of the awesome animals we have here. The kids get to make a stamp bookmark, and I usually have them touch the bobcat and otter pelts and compare them.

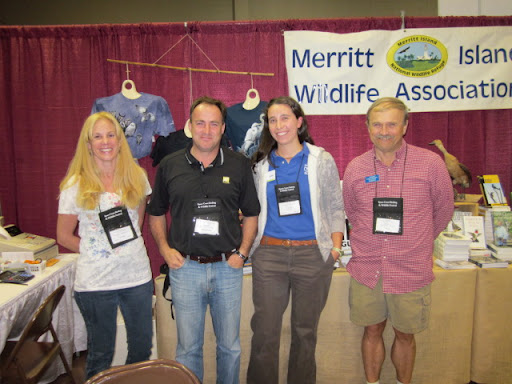
Here I am with Connie and Joann, two of the volunteers, also known as the Festival Extraordinaire Ladies.  They’ve got the festival gig down pat. They have also adopted me as a grandchild, though I told them that no one can measure up to the wonderful Grandma I have who sends me cookies in the mail (Thank you Grandma Cindea! I love you bunches!!)

Yes, those are giant ants on the table. No, they are not real, no, we don’t have ants that big on the refuge, and no, they’re not for sale. Everyone comments on the ants, that’s what really brings people over to our table.

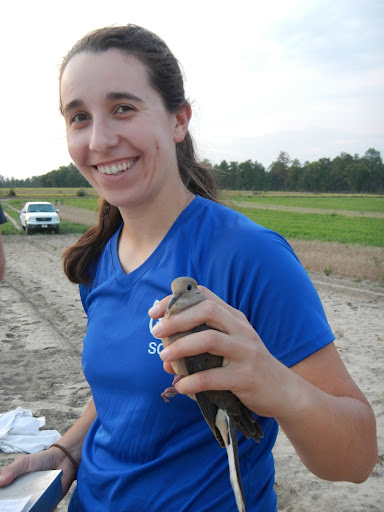
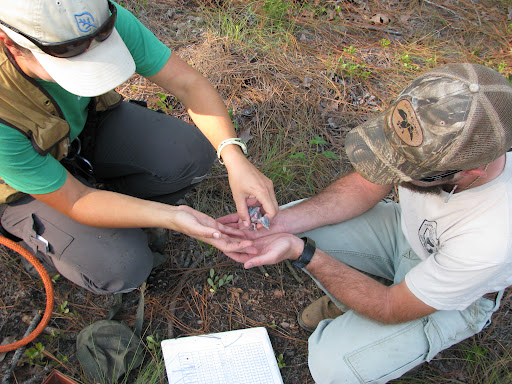
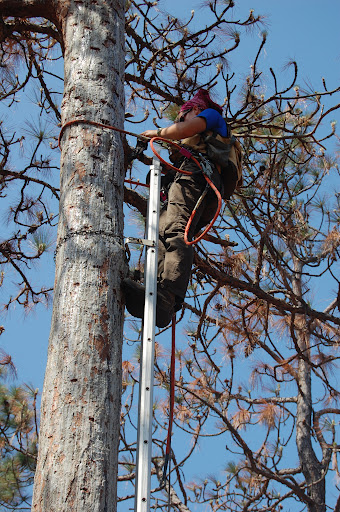
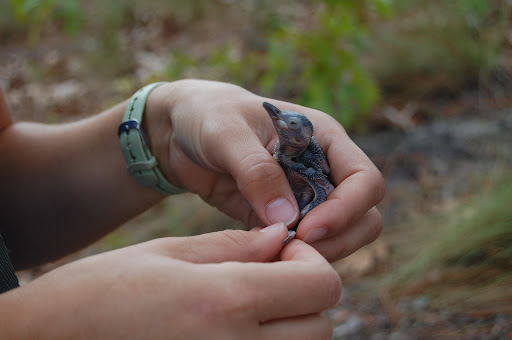
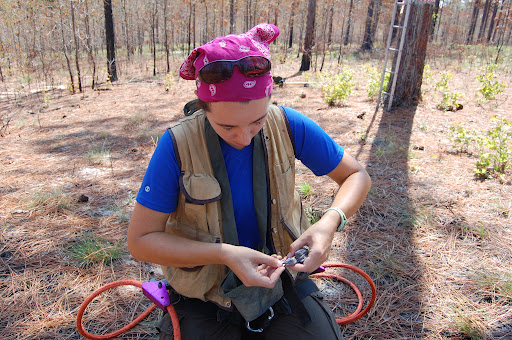
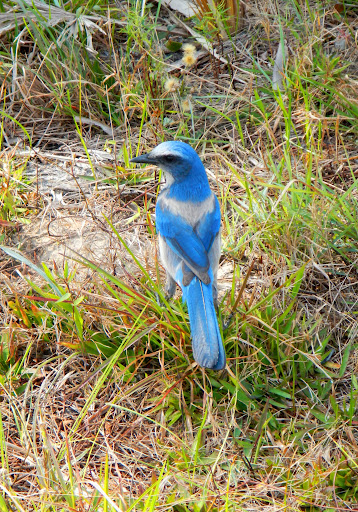
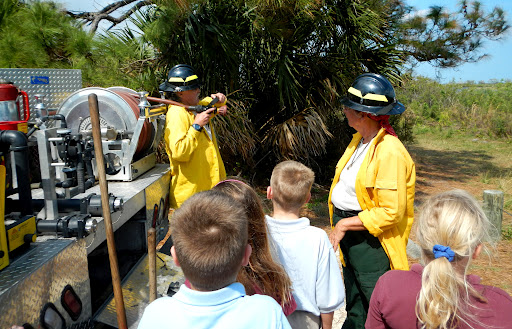
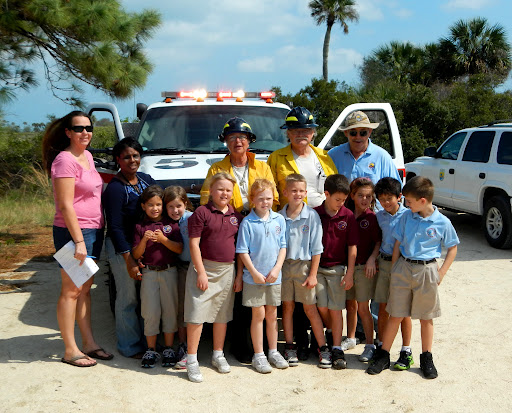
Sometimes I help with school programs and we get to hang out with Florida Scrub Jays. They are very curious, and will come land on your head or hand if you hold it out, looking for peanuts. The biologists have trained them to enter traps in order to band them for monitoring purposes. The traps are baited with peanuts, so the jays get a treat for their hassle.

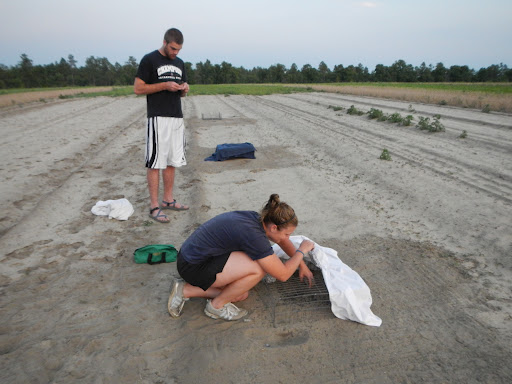
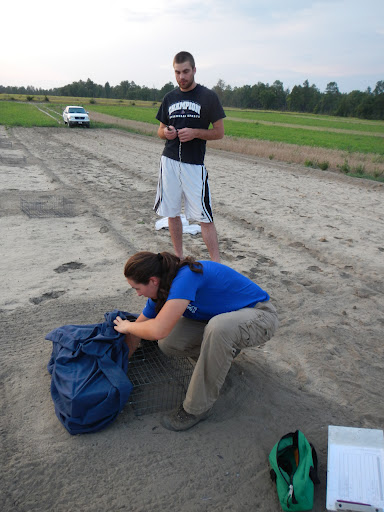
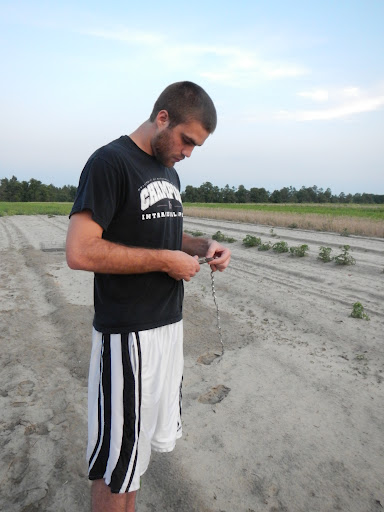
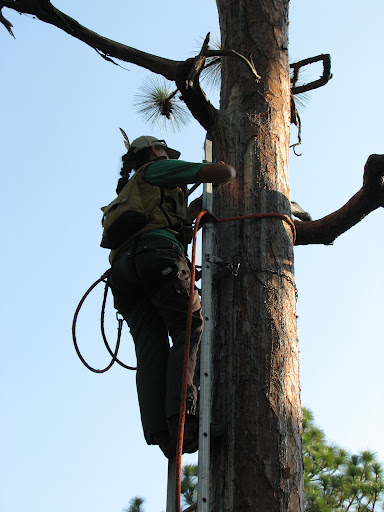
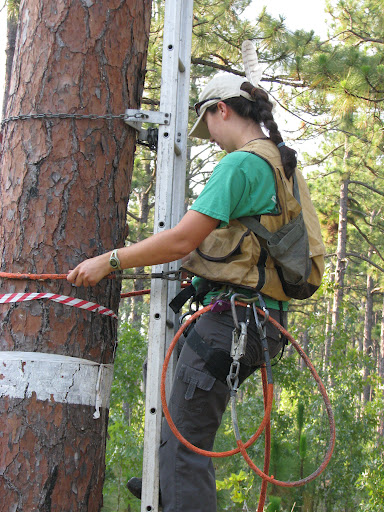
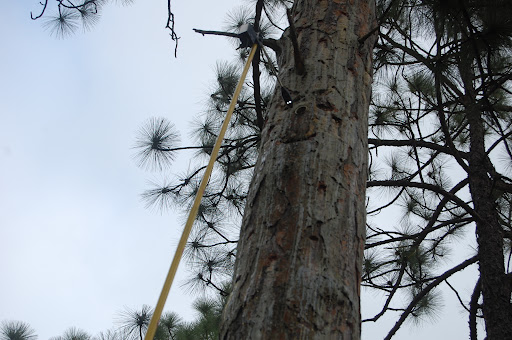
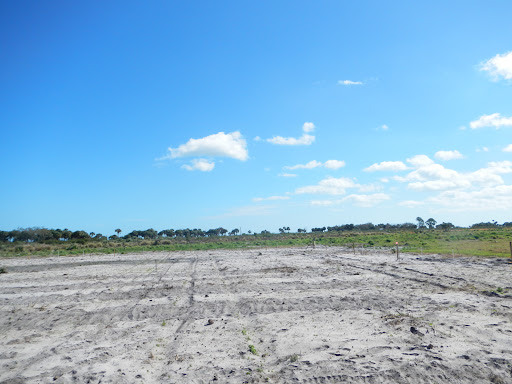
Sometimes I’m allowed to go out with the biologists and do fun biology things, like help restore scrub habitat. As Mike, the head biologist, was explaining to me when he kidnapped me and forced me to help him fill a spray tank, no one has been really successful at restoring scrub, which is a problem for wildlife managers trying to help the scrub jays and other species that depend on scrub habitat. The area we were working in used to be a grapefruit grove, but they are trying to make it

For us, this meant planting seeds in the hot sun in a quarter-acre plot. It was actually quite fun, and there were scrub jays hanging out nearby watching us, and lots of fun birds flew overhead. Also, a man on a motorcycle rode by blaring “Uptown Girls,” which I then got stuck in everyone’s heads (going on a week now).

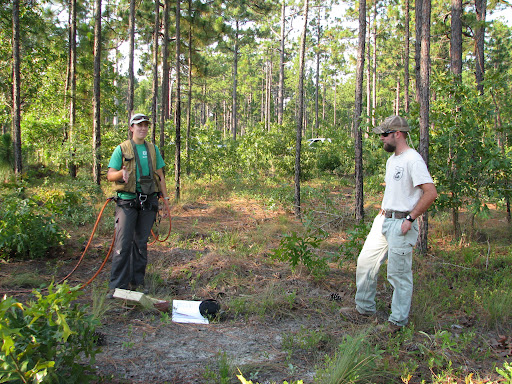
The field we planted with scrub plant seeds.

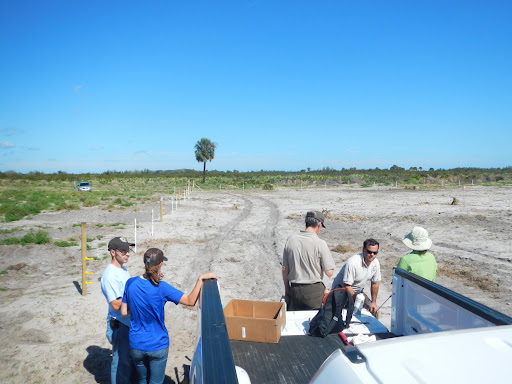
Here we all are hard at work. This is what most of the morning looked like, hanging out in a barren field and contemplating the scrub.

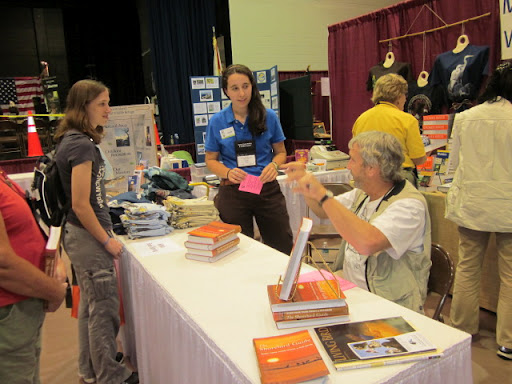
Sometimes I hobnob with famous birdy people. Here I am at the Space Coast Birding and Wildlife Festival with two other Merritt Island NWR volunteers and Richard Crossley (in the black shirt). He was the keynote speaker at the festival this year, and because I was helping to sell his books I had the chance to hear him speak and got him to autograph my copies of his books, The Shorebird Guide and The Crossley ID Guide (came out just last year). We chatted for a bit, he’s a fun guy. Also takes fantastic pictures of birds.

Same birding festival, different day, with Kevin Karlson. He is a co-author of The Shorebird Guide, and also autographed my copy. Another fantastic photographer and birder, and also fun to talk with.

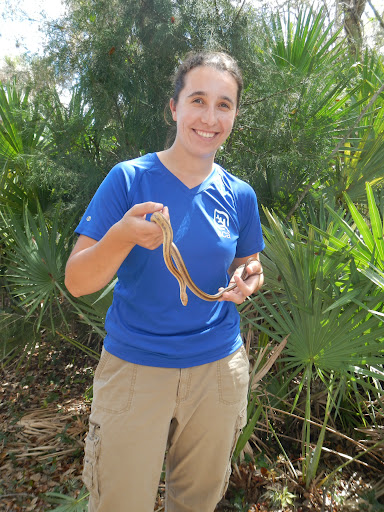
Sometimes I hobnob with snakes (this happens a lot, actually). This is Buddy, our education snake. We hang out together a lot, he’s my bud. The other day I had him out at the Visitor Center, showing him to some of the visitor. Buddy decided he wanted to crawl into my shirt, and did so, going up my right sleeve. He was across the front of my chest before I noticed, so I tried to pull him out via the front of my shirt. He was having none of that, and kept aiming for my other sleeve, like he was going to crawl all the way through. This doesn’t really bother me, but I’m aware that quite a few other people are not fond of snakes and the idea that I would even hold him is disturbing, so I tried to excuse myself from the people I was talking to so I wouldn’t bother them too much. I also wasn’t entirely sure I would be able to get him out of my shirt without taking it off, so I figured I probably should do that in the privacy of the back office, or the restroom. The people I was talking with didn’t seem to mind, in fact the woman starting taking pictures of me with a snake up one sleeve and part of his mid-section out the front of my shirt, his head moving back and forth under my shirt on my other shoulder.

I should have asked her to send me a copy, I’m sure it looked pretty funny.

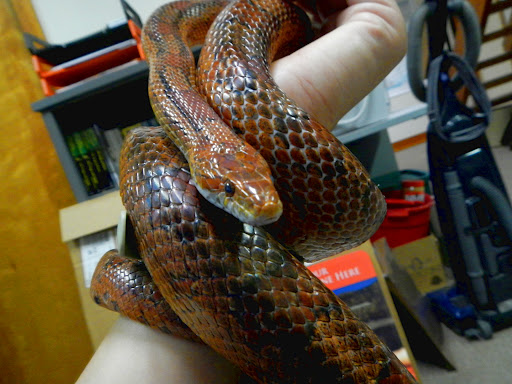
This is a yellow rat snake we fished out of the trashcan so it wouldn’t bother the visitors. After the photo op, we released it back into the palmettos.

Rat snakes are generally very docile creatures, and all of the ones I’ve handled have been quite friendly. They generally like climbing around my person and going through my hair and belt-loops, which can be interesting, having a live snake-skin belt. This is one of Buddy’s favorite activities when I’m not paying attention. He also likes to go through my braid or pony-tail, so I have to undo my hair to get him out.

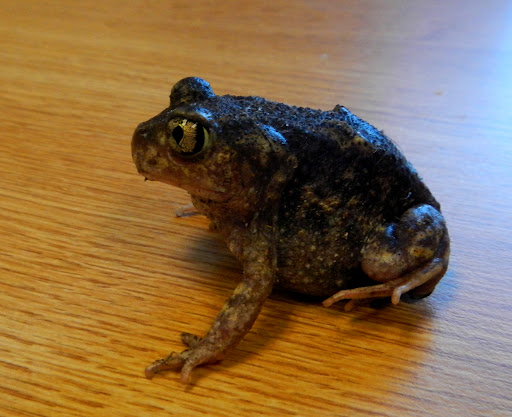
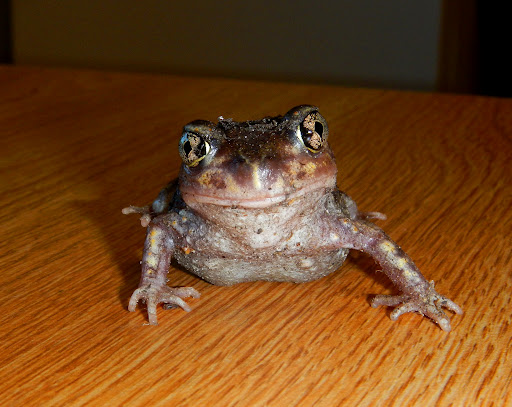
If you didn’t have enough of the creepy-crawly, here are some toad pictures! This is a spadefoot toad that one of the biologists brought to show us. He found it in the fire garage, and  thought that might not be the best place for a toad to live.

Only a few more weeks left here in Florida, so I’ll try to get more pictures up soon!

Cinammon Teal in Florida!

There has been a Cinnamon Teal at MINWR for the past few days now, and no one really knows what it’s doing here. Cinnamon Teal are normally found in the western part of the U.S., and this time of year they should be wintering in Mexico, Central and South America. According to the Merritt Island bird list, the last time a Cinnamon Teal was seen here on the refuge was in 2000.

I went out yesterday morning with some of the volunteers to see if it could be spotted. We met up with three other birders/photographers, and between the six of us we found it (and by that I mean one of the others found it while I was busy watching the Black Skimmers– pictures to come). I tried to take a few pictures through the spotting scope, but every time I clicked this happened:

The Cinnamon Teal is the one in the middle, with its head underwater.

So I decided to take a video instead, because then I wouldn’t have to worry about my timing. That, and we had to go pick up a fire truck for a school program later that morning, so we didn’t have much time to mess with taking pictures.

The Cinnamon Teal is the reddish-cinnamon colored bird in the middle that keeps putting its head underwater. There are quite a few Northern Pintail swimming about in front of it, and a couple Blue-winged Teal snoozing behind it.  The black on the side is because I took the video through the spotting scope with my little point-and-shoot, and I’m still learning the ins and out of digiscoping (taking pictures with a camera through a spotting scope, i.e. using it as a big lens to get pictures of far away birds that otherwise would be little specs).

I also took pictures of the fire truck, and I got to ride in it. It smelled like smoke, and was basically just riding in a big white truck with lots of extra buttons I wasn’t allowed to touch.

USFWS fire trucks don’t have sirens, because they don’t exactly need them to fight forest fires and manage controlled burns. The animals already know to get out of the way, they don’t need a siren to tell them something’s burning. They’re smart like that.

Cary, a volunteer, demonstrating the fire hose

The kids loved the program, and hopefully they learned a little bit about controlled burns as well as all the animals that depend on scrub habitat.

Some of the school group and a chaperone, their teacher, and volunteers Cary and Betty Salter (in fire-fighting garb) and volunteer Bill Nunn